A Million of users across the globe are heading towards Rock space WiFi extender because of its outstanding feat[?0res. If you also want to take the advantages of Rock space extender’s flawless features, you first need to set it is using its default credentials provided in the Rockspace WiFi extender manual.
Follow the guidelines provided in this article and learn how to perform Rock space WiFi extender setup.
Set Up Rock Space WiFi Extender
Over here, we are going to discuss two different methods through which you can easily perform Rock space WiFi extender setup process. Both the methods are provided below:
- WPS method
- Manual method
Rock Space WiFi Extender Setup via WPS
Here are the steps that will help you configure your Rock space WiFi extender using the WPS method:
Step 1: Unbox your Rock space WiFi extender.
Step 2: Plug in your extender into a working wall outlet that is non-damaged and near to your router. In case you don’t have the same, please put extension cord in use. But, do not delay the Rock space WiFi extender setup process.
Step 3: Press the WPS button on your Rock space WiFi extender.
Step 4: Once you are done, wait for a few minutes and then press the WPS button on your router.
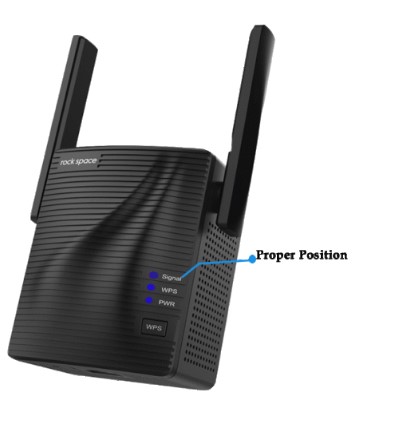
Step 5: Change the location of your Rock space WiFi extender. Plug the extender where you need to access the internet the most.
Bear in mind, to perform Rock space WiFi extender setup process using the WPS method, your WiFi router must have the WPS function. If it doesn’t, don’t think that you will never be able to complete the configuration process of Rock space WiFi extender via WPS. There is a way out and that is Rock space WiFi extender setup process using the manual method.
Rockspace Extender Setup via Manual Method
Rockspace extender setup using the manual method requires default web address and the login details:
Step 1: Turn on your Rock space WiFi extender by plugging it in.
Step 2: Using an Ethernet cable, connect your Rock space WiFi extender and router.
Step 3: Next, open a web browser of your choice. Keep in mind to use an updated web browser and avoid using the private window.
Step 4: Enter the default web address of your Rock space WiFi extender in the URL bar. Have you used the search bar? If yes, please prevent using that and also don’t forget to clear the browsing history, got it?
Step 5: Press the Enter key to access the Rock space WiFi extender login page.
Step 6: There, you will be prompted to input the default Rock space WiFi extender username and password.
Step 7: Click on Log In to reach the Basic home page or Dashboard of your Rock space WiFi extender.
Step 8: Follow the on-screen instructions as they are provided. Else, you will come across Rock space WiFi extender setup issues.
Rock Space WiFi Extender Setup Failed?
Are you unable to configure your Rock space WiFi extender? No worries! A number of users face this type of issue. For fixing it, we suggest users to reset Rock space wifi extender back to factory default values. Resetting is one of the most effective remedies to fix major issues with Rock space WiFi extender.
Reset Rock Space WiFi Extender
To reset Rock space wifi extender, here are the guidelines to be followed:
Step 1: Do not unplug your Rock space WiFi extender but do disconnect it from your router and client devices.
Step 2: Locate the Rock space extender’s reset hole and press it using a pin or a paper clip upon finding it.
Step 3: Keep holding the Rock space extender’s reset hole for some time and thereafter, release it.
Now, using the WPS or the manual method, perform Rock space WiFi extender setup process from the scratch.
The Bottom Line
Performing Rock space WiFi extender setup is one of the excellent options if you want to blanket your home with an uninterrupted and stable WiFi connection. Anticipating that the aforementioned guidelines have helped you perform Rock space WiFi extender setup process with ease. Please share with us, which method you found easy and applied for configuring your Rock space WiFi extender.