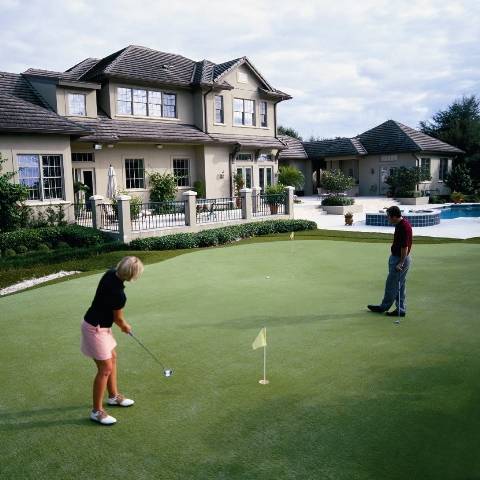
We have great news if you want to build the perfect golf space in your home. You won’t need a lot of space and expensive equipment to design the golf space of your dreams.
With a bit of creativity and the right space, you can transform any part of your backyard into a functional golf space.
However, you need to take care of two vital things: a detailed plan and a team to help you with the custom putting green installation.
And if you are thinking about how to go about it, this blog post will help you.
Let’s start building.
Steps to Build the Perfect Golf Space at Home
As we have just talked, you need to plan well to ensure that the entire project goes smoothly from the beginning to the end of the custom putting green installation process.
Here is a step-by-step guide to follow when installing golf-putting greens for the home.
Step #1: Scout and find the right space.
Where you build your outdoor golf course is vital to enjoying it. Hence, always scout for the right space and take your time to finalize it.
You can also take second opinions from your spouse or others who know about installing backyard putting greens. Choose a relatively flat area with a slight slope for the golf to work.
It is also here you need to design the shape and size of the green. You must also decide whether to go with single or multiple holes based on the size.
Step #2: Prepare the site before installing the green.
Many homeowners looking to install golf-putting greens for homes often make the mistake of not preparing the site. Doing so can lead to several issues in the future and may cost you heavily for repair.
The best way to avoid such incidents is to prepare your site well.
—Remove any grass, stones, debris, weeds, etc., from the site.
—Create a slope if the site does not have enough slope.
—Level the surface to make sure it is even.
—It is also vital to compact the soil to make it robust.
Step #3: Install the base.
In this stage, you can install the outdoor putting greens on your prepared site. A compact aggregate like sand or gravel is the best way to create a stable foundation.
A strong base helps with drainage and provides a smooth surface for the turf. It also helps you install the turf easily.
Failing to install the base may lead to numerous issues in the future, such as:
—An uneven surface that is hard to play on
—No structural support to avoid shifting or sagging
—Low longevity and durability of the putting green
All these issues might make your putting experience less enjoyable and realistic.
Step #4: Choose the right turf for the putting green
The type of turf you want to use for your putting is a key component in ensuring the quality of your game.
There are two types of turfs you can use:
- Artificial green turf: This is made of synthetic materials like polyethylene, polypropylene, or nylon, with a backing that provides stability. The fiber mimics the look and feel of natural grass.
- Natural grass: In this type of turf, natural grass is planted and nurtured at the right length for the golf putting green. It requires constant maintenance and mowing to keep it at the right height.
You can pick any of these options based on your preference. While natural grass seems more viable, artificial turf is better:
—It does not need mowing, watering, fertilizing, or reseeding.
—It eliminates the need for watering, making it more eco-friendly.
—Artificial grass withstands heavy foot traffic and extreme weather.
—Unlike natural grass, artificial turf stays lush and green all year.
You can also install artificial turf in places where natural grass wouldn’t grow or is hard to grow.
Step #5: Lay the turf
In this stage, you can lay the turf. You can do it yourself or work with a company to install outdoor putting greens.
It is always better if you can work with professionals, as they have the experience and expertise to do it. They would also have all the materials and equipment needed to complement the installation perfectly.
While laying the turf, ensure the surface is smooth and covers the area accurately. Add sand and gravel under the turf to mimic the challenges you see in a real golf course to create contours.
You can also remove the excess turf by cutting it out. Then, secure the turf on the surface with nails or industry-grade adhesive.
Step #6: Add cups and holes
Once you have laid the turf, it is time to add cups and holes. Dig holes in the surface for the cups,
When adding holes and cups, ensure they are level with the surface, and there is enough space for drainage. This will make the turf look more professional and functional across different seasons.
It is also a good idea to mark the spots where the holes and cups will be placed before you start the custom putting green installation process.
Step #7: Add finishing touches to the turf
With this step, you get to the last stage of building a golf turf at home. Here, you must look for anything on the turf that needs finishing touches.
Adding fringe turf on the edges of the main backyard putting greens is a great way to make your golf green look more stylish and professional. Before finishing, check for any uneven surfaces and even it out.
With this, you have perfect golf putting greens for home, and you can spend your time with your family, friends, or even colleagues.
Install Golf Putting Greens for Home with Professionals
Installing outdoor putting greens at home is often a dream come true for golf enthusiasts. There is nothing more fun than playing golf on your own course from the comfort of your home. Although many golf players try to build golf putting greens themselves as a DIY project, there are several ways it can go wrong. These issues can be avoided by working with a professional team like Fieldturf Landscape that specializes in high-quality residential artificial turf solutions.
We have worked with numerous global and US clients, delivering top-notch service and installing and maintaining their turf according to their requirements. Our team of skilled and experienced professionals in the field can help you with all your needs regarding custom putting green installation for your home or anywhere else.
Book a free consultation call to learn more about our services and products.